
Laravel 10 User Registration with Email Verification
In this tutorial, I will show how to create a custom user registration with email verification in Laravel 10 with easy step by step guide.
You can implement custom Laravel email verification in Laravel 8, 9 and 10 as well. This code is compatible in all these Laravel versions.
Although, Laravel UI package makes it easy to create user registration with email confirmation by using Bootstrap Auth Scaffolding and implementing a MustVerifyEmail contract in your user Model.
I have previously shared a tutorial on how to implement a Laravel bootstrap auth scaffolding with email confirmation. However, if you are implementing a custom user registration then you will need to implement a custom email verification method as well.
I have also shared a Laravel custom user registration and login tutorial. So, now in this tutorial, I will use the approximately same code for custom user registration in Laravel and make some necessary changes to implement a custom email verification in our Laravel 10 application.
Following are the screenshots of our Laravel 10 application with custom email verification.
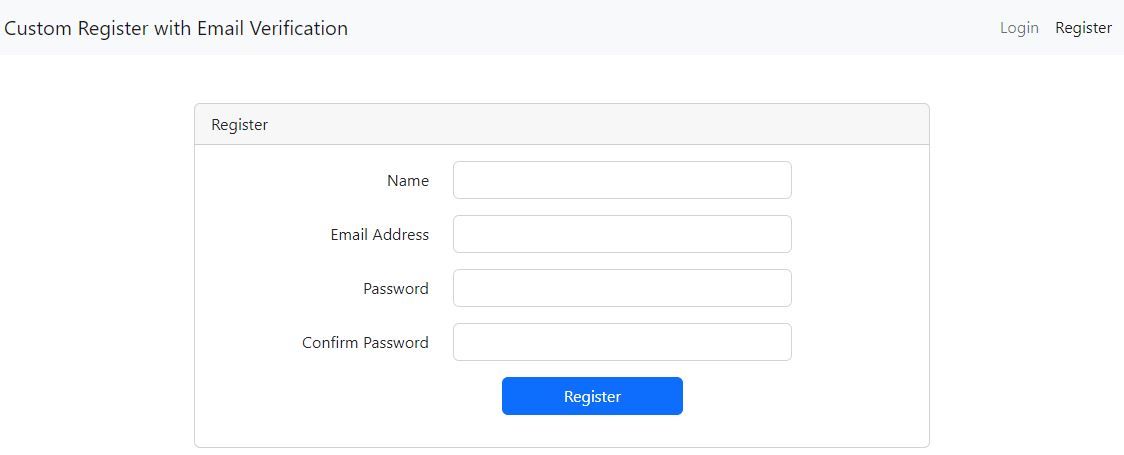
User Registration Page
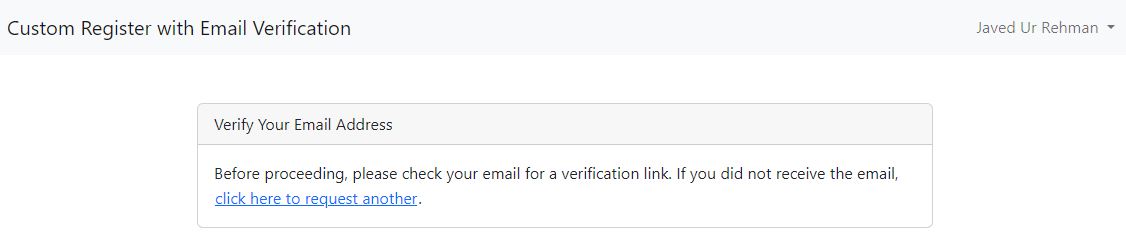
User Email Verification Notice Page
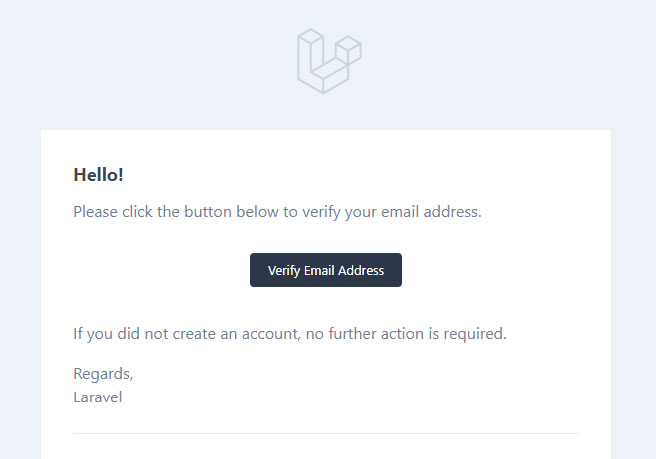
Verification Message on Email
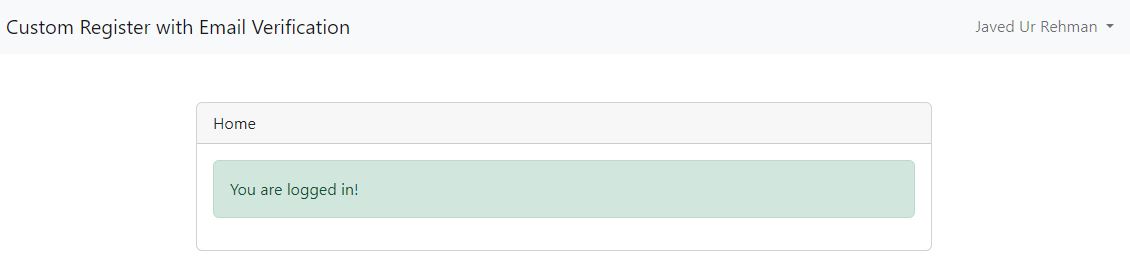
Verified User Homepage
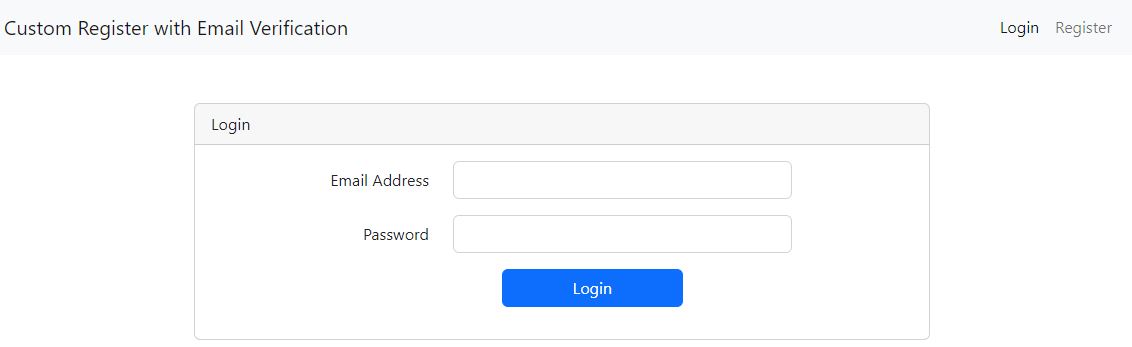
Login Page
Readers Also Read: Laravel 10 User Roles and Permissions
So without further delay, lets start coding for Laravel 10 user registration with email verification.
Steps to Create Laravel 10 User Registration with Email Verification
Follow the below easy steps to create Laravel custom user registration with email verification.
- Install Latest Laravel App
- Configure Database and SMTP Credentials
- Implement MustVerifyEmail Contract in User Model
- Migrate Tables to Database
- Define Custom Registration, Verification, Home and Login Routes
- Create a LoginRegister Controller
- Create a Verification Controller
- Create Login, Register, and Verification Blade View Files
- Run Laravel Development Server
1. Install Latest Laravel App
Open the command prompt or terminal window and go to your desired directory where you want to install the latest Laravel app. I use workspace directory for development.
cd desktop\workspaceYou may also follow my tutorial on how to install Laravel on Windows 11. If you do not have idea about how to install Laravel on Windows.
Install the latest Laravel application with name CustomRegisterEmailConfirm by running the below command on your terminal window.
composer create-project --prefer-dist laravel/laravel:^10 CustomRegisterEmailConfirmAnd then head to the CustomRegisterEmailConfirm directory by running the below command.
cd CustomRegisterEmailConfirm2. Configure Database and SMTP Credentials
In the second step, I will configure my database and SMTP credentials for my Laravel app. Just update the .env file which is located on the application root directory.
Simply open the .env file and enter your own database and SMTP credentials details like below.
Database Credentials:
DB_CONNECTION=mysql
DB_HOST=127.0.0.1
DB_PORT=3306
DB_DATABASE=your_db_name
DB_USERNAME=your_db_username
DB_PASSWORD=your_db_password
SMTP Credentials:
MAIL_MAILER=smtp
MAIL_HOST=your_website.com
MAIL_PORT=465
MAIL_USERNAME="your_email@your_website.com"
MAIL_PASSWORD="your_password"
MAIL_ENCRYPTION=tls
MAIL_FROM_ADDRESS="your_email@your_website.com"
MAIL_FROM_NAME="${APP_NAME}"
To work with MySQL database, you must need to have it in your system and PHP 8.1 is required for Laravel 10.
If your system does not have MySQL/MariaDB/PHP then you can easily get it by installing XAMPP.
Follow my this easy and step by step tutorial on how to install XAMPP on Windows 11 to get MySQL and PHP in your machine.
3. Implement MustVerifyEmail Contract in User Model
Go to the app\Models\User.php and remove single line comment \\ from MustVerifyEmail contract to enable it.
use Illuminate\Contracts\Auth\MustVerifyEmail;And then implement MustVerifyEmail contract in your User class like mentioned below.
class User extends Authenticatable implements MustVerifyEmail4. Migrate Tables to Database
Laravel comes with the predefined user table schema therefore I do not need to create user migration or model, I will migrate all Laravel basic tables into our database.
Simply run the below command in your terminal to migrate all basic tables.
php artisan migrate5. Define Custom Registration, Verification, Home and Login Routes
Now in this step, I will need to create my custom user registration, verification, home and login routes. You will need to simply copy paste the below code in your routes/web.php file.
<?php
use Illuminate\Support\Facades\Route;
use App\Http\Controllers\Auth\VerificationController;
use App\Http\Controllers\Auth\LoginRegisterController;

/*
|--------------------------------------------------------------------------
| Web Routes
|--------------------------------------------------------------------------
|
| Here is where you can register web routes for your application. These
| routes are loaded by the RouteServiceProvider and all of them will
| be assigned to the "web" middleware group. Make something great!
|
*/

Route::get('/', function () {
    return view('welcome');
});

// Define Custom User Registration & Login Routes
Route::controller(LoginRegisterController::class)->group(function() {
    Route::get('/register', 'register')->name('register');
    Route::post('/store', 'store')->name('store');
    Route::get('/login', 'login')->name('login');
    Route::post('/authenticate', 'authenticate')->name('authenticate');
    Route::get('/home', 'home')->name('home');
    Route::post('/logout', 'logout')->name('logout');
});

// Define Custom Verification Routes
Route::controller(VerificationController::class)->group(function() {
    Route::get('/email/verify', 'notice')->name('verification.notice');
    Route::get('/email/verify/{id}/{hash}', 'verify')->name('verification.verify');
    Route::post('/email/resend', 'resend')->name('verification.resend');
});
As you can see in the above code, I have also given them relevant names to our each routes for the convenience use in controller and views.
I will implement relevant middleware of each route in the controllers files.
Readers Also Read: Laravel 10 CRUD Application
6. Create a LoginRegister Controller
In this step, I will create a LoginRegisterController with the six (6) methods in it, I have discussed all these methods working in my Laravel 10 custom user registration and login tutorial, therefore I will not go into the detail working of these methods.
However, I just made some changes in this controller so that it should work for verification for which I am actually working.
I am also using the Laravel default home route for verified users instead of creating custom dashboard route. This will eliminate extra working on RouteServiceProvider.php
Run the below command to create a LoginRegisterController controller.
php artisan make:controller Auth\LoginRegisterControllerThis command will create a controller in the app\Http\Controllers\Auth\ directory, all you need is to copy paste the below code in the file app\Http\Controllers\Auth\LoginRegisterController.php
<?php

namespace App\Http\Controllers\Auth;

use App\Http\Controllers\Controller;
use Illuminate\Http\Request;
use App\Models\User;
use Illuminate\Support\Facades\Auth;
use Illuminate\Support\Facades\Hash;
use Illuminate\Auth\Events\Registered;

class LoginRegisterController extends Controller
{
    /**
     * Instantiate a new LoginRegisterController instance.
     */
    public function __construct()
    {
        $this->middleware('guest')->except([
            'logout', 'home'
        ]);
        $this->middleware('auth')->only('logout', 'home');
        $this->middleware('verified')->only('home');
    }

    /**
     * Display a registration form.
     *
     * @return \Illuminate\Http\Response
     */
    public function register()
    {
        return view('auth.register');
    }

    /**
     * Store a new user.
     *
     * @param  \Illuminate\Http\Request  $request
     * @return \Illuminate\Http\Response
     */
    public function store(Request $request)
    {
        $request->validate([
            'name' => 'required|string|max:250',
            'email' => 'required|string|email:rfc,dns|max:250|unique:users,email',
            'password' => 'required|string|min:8|confirmed'
        ]);

        $user = User::create([
            'name' => $request->name,
            'email' => $request->email,
            'password' => Hash::make($request->password)
        ]);

        event(new Registered($user));

        $credentials = $request->only('email', 'password');
        Auth::attempt($credentials);
        $request->session()->regenerate();
        return redirect()->route('verification.notice');
    }

    /**
     * Display a login form.
     *
     * @return \Illuminate\Http\Response
     */
    public function login()
    {
        return view('auth.login');
    }

    /**
     * Authenticate the user.
     *
     * @param  \Illuminate\Http\Request  $request
     * @return \Illuminate\Http\Response
     */
    public function authenticate(Request $request)
    {
        $credentials = $request->validate([
            'email' => 'required|email',
            'password' => 'required'
        ]);

        if(Auth::attempt($credentials))
        {
            $request->session()->regenerate();
            return redirect()->route('home');
        }

        return back()->withErrors([
            'email' => 'Your provided credentials do not match in our records.',
        ])->onlyInput('email');

    }

    /**
     * Display a home to authenticated & verified users.
     *
     * @return \Illuminate\Http\Response
     */
    public function home()
    {
        return view('auth.home');
    }

    /**
     * Log out the user from application.
     *
     * @param  \Illuminate\Http\Request  $request
     * @return \Illuminate\Http\Response
     */
    public function logout(Request $request)
    {
        Auth::logout();
        $request->session()->invalidate();
        $request->session()->regenerateToken();
        return redirect()->route('login')
            ->withSuccess('You have logged out successfully!');
    }

}
Well as you can see in the above controller code that I have also added a constructor to add the different middleware to our routes, all the routes in this controller are guest except logout and home routes.
These logout and home routes can only be accessed by a registered user. I have additionally applied a verified middleware to my home method only. This will ensure the user have also verified email address as well.
7. Create a Verification Controller
In this 7th step, I will create a controller with name VerificationController with the three (3) methods in it which are listed below.
- notice() -> To display the verification notice to a registered user.
- verify() -> To perform the email verification when user click on the link on email.
- resend() -> To resend the verification email in case if user didn’t receive or deleted the verification email unintentionally.
Run the below command to create a VerificationController controller.
php artisan make:controller Auth\VerificationControllerThe above command will create another controller in the app\Http\Controllers\Auth\ directory, simply copy and paste the below code in the app\Http\Controllers\Auth\VerificationController.php file.
<?php

namespace App\Http\Controllers\Auth;

use App\Http\Controllers\Controller;
use Illuminate\Http\Request;
use Illuminate\Foundation\Auth\EmailVerificationRequest;

class VerificationController extends Controller
{
    /**
     * Instantiate a new VerificationController instance.
     */
    public function __construct()
    {
        $this->middleware('auth');
        $this->middleware('signed')->only('verify');
        $this->middleware('throttle:6,1')->only('verify', 'resend');
    }

    /**
     * Display an email verification notice.
     *
     * @return \Illuminate\Http\Response
     */
    public function notice(Request $request)
    {
        return $request->user()->hasVerifiedEmail()
            ? redirect()->route('home') : view('auth.verify-email');
    }

    /**
     * User's email verificaiton.
     *
     * @param  \Illuminate\Http\EmailVerificationRequest $request
     * @return \Illuminate\Http\Response
     */
    public function verify(EmailVerificationRequest $request)
    {
        $request->fulfill();
        return redirect()->route('home');
    }

    /**
     * Resent verificaiton email to user.
     *
     * @param  \Illuminate\Http\Request  $request
     * @return \Illuminate\Http\Response
     */
    public function resend(Request $request)
    {
        $request->user()->sendEmailVerificationNotification();
        return back()
        ->withSuccess('A fresh verification link has been sent to your email address.');
    }

}
I have also added a constructor in this controller as well to apply the middleware to my verification routes.
These all routes can only be accessed by a registered users. I have additionally applied the signed middleware to only verify method in this controller.
I have also applied additional middleware throttle:6,1 to the verify() and resend() method to limit the number of resend verification email request and perform verification.
middleware(‘throttle:6,1’) it simply means that user can make 6 resend verification email request within 1 minute of time.
The notice() method will check if user has not verified then display the verification notice otherwise redirect to verified users home route.
The verify() method is using an EmailVerificationRequest, this will automatically handle the validation of the id and hash parameters of request in email verification.
The third resend() method will simply resend verification link to user and display successful message to user on verification notice page.
8. Create Login, Register, and Verification Blade View Files
Now I will create an auth directory in resources/views/ directory and then create the following blade view files in it.
- layouts.blade.php
- register.blade.php
- verify-email.blade.php
- home.blade.php
- login.blade.php
layouts.blade.php is a main layout of my Laravel registration and email confirmation application, copy paste the below code in the file resources/views/auth/layouts.blade.php
<!DOCTYPE html>
<html lang="en">
<head>
    <meta charset="UTF-8">
    <meta name="viewport" content="width=device-width, initial-scale=1.0">
    <meta http-equiv="X-UA-Compatible" content="ie=edge">
    <title>Laravel 10 User Registration with Email Verification - AllPHPTricks.com</title>
    <link href="https://cdn.jsdelivr.net/npm/[email protected]/dist/css/bootstrap.min.css" rel="stylesheet" integrity="sha384-rbsA2VBKQhggwzxH7pPCaAqO46MgnOM80zW1RWuH61DGLwZJEdK2Kadq2F9CUG65" crossorigin="anonymous">
</head>
<body>

    <nav class="navbar navbar-expand-lg bg-light">
        <div class="container">
          <a class="navbar-brand" href="{{ URL('/') }}">Custom Register with Email Verification</a>
          <button class="navbar-toggler" type="button" data-bs-toggle="collapse" data-bs-target="#navbarNavDropdown" aria-controls="navbarNavDropdown" aria-expanded="false" aria-label="Toggle navigation">
            <span class="navbar-toggler-icon"></span>
          </button>
          <div class="collapse navbar-collapse" id="navbarNavDropdown">
            <ul class="navbar-nav ms-auto">
                @guest
                    <li class="nav-item">
                        <a class="nav-link {{ (request()->is('login')) ? 'active' : '' }}" href="{{ route('login') }}">Login</a>
                    </li>
                    <li class="nav-item">
                        <a class="nav-link {{ (request()->is('register')) ? 'active' : '' }}" href="{{ route('register') }}">Register</a>
                    </li>
                @else
                    <li class="nav-item dropdown">
                        <a class="nav-link dropdown-toggle" href="#" role="button" data-bs-toggle="dropdown" aria-expanded="false">
                            {{ Auth::user()->name }}
                        </a>
                        <ul class="dropdown-menu">
                        <li><a class="dropdown-item" href="{{ route('logout') }}"
                            onclick="event.preventDefault();
                            document.getElementById('logout-form').submit();"
                            >Logout</a>
                            <form id="logout-form" action="{{ route('logout') }}" method="POST">
                                @csrf
                            </form>
                        </li>
                        </ul>
                    </li>
                @endguest
            </ul>
          </div>
        </div>
    </nav>

    <div class="container">
        @yield('content')
        <div class="row justify-content-center text-center mt-3">
            <div class="col-md-12">
                <p>Back to Tutorial:
                    <a href="https://www.allphptricks.com/laravel-user-registration-with-email-verification/"><strong>Tutorial Link</strong></a>
                </p>
                <p>
                    For More Web Development Tutorials Visit: <a href="https://www.allphptricks.com/"><strong>AllPHPTricks.com</strong></a>
                </p>
            </div>
    </div>

<script src="https://cdn.jsdelivr.net/npm/[email protected]/dist/js/bootstrap.bundle.min.js" integrity="sha384-kenU1KFdBIe4zVF0s0G1M5b4hcpxyD9F7jL+jjXkk+Q2h455rYXK/7HAuoJl+0I4" crossorigin="anonymous"></script>
</body>
</html>
register.blade.php is my app registration page, copy and paste the below code snippets in the file resources/views/auth/register.blade.php
@extends('auth.layouts')

@section('content')

<div class="row justify-content-center mt-5">
    <div class="col-md-8">

        <div class="card">
            <div class="card-header">Register</div>
            <div class="card-body">
                <form action="{{ route('store') }}" method="post">
                    @csrf
                    <div class="mb-3 row">
                        <label for="name" class="col-md-4 col-form-label text-md-end text-start">Name</label>
                        <div class="col-md-6">
                          <input type="text" class="form-control @error('name') is-invalid @enderror" id="name" name="name" value="{{ old('name') }}">
                            @if ($errors->has('name'))
                                <span class="text-danger">{{ $errors->first('name') }}</span>
                            @endif
                        </div>
                    </div>
                    <div class="mb-3 row">
                        <label for="email" class="col-md-4 col-form-label text-md-end text-start">Email Address</label>
                        <div class="col-md-6">
                          <input type="email" class="form-control @error('email') is-invalid @enderror" id="email" name="email" value="{{ old('email') }}">
                            @if ($errors->has('email'))
                                <span class="text-danger">{{ $errors->first('email') }}</span>
                            @endif
                        </div>
                    </div>
                    <div class="mb-3 row">
                        <label for="password" class="col-md-4 col-form-label text-md-end text-start">Password</label>
                        <div class="col-md-6">
                          <input type="password" class="form-control @error('password') is-invalid @enderror" id="password" name="password">
                            @if ($errors->has('password'))
                                <span class="text-danger">{{ $errors->first('password') }}</span>
                            @endif
                        </div>
                    </div>
                    <div class="mb-3 row">
                        <label for="password_confirmation" class="col-md-4 col-form-label text-md-end text-start">Confirm Password</label>
                        <div class="col-md-6">
                          <input type="password" class="form-control" id="password_confirmation" name="password_confirmation">
                        </div>
                    </div>
                    <div class="mb-3 row">
                        <input type="submit" class="col-md-3 offset-md-5 btn btn-primary" value="Register">
                    </div>

                </form>
            </div>
        </div>
    </div>
</div>

@endsection
verify-email.blade.php is the email verify notification page, just copy and paste the below code in the file resources/views/auth/verify-email.blade.php
@extends('auth.layouts')

@section('content')

<div class="row justify-content-center mt-5">
    <div class="col-md-8">
        <div class="card">
            <div class="card-header">Verify Your Email Address</div>
            <div class="card-body">
                @if ($message = Session::get('success'))
                    <div class="alert alert-success" role="alert">
                        {{ $message }}
                    </div>
                @endif
                Before proceeding, please check your email for a verification link. If you did not receive the email,
                <form class="d-inline" method="POST" action="{{ route('verification.resend') }}">
                    @csrf
                    <button type="submit" class="btn btn-link p-0 m-0 align-baseline">click here to request another</button>.
                </form>
            </div>
        </div>
    </div>
</div>

@endsection
home.blade.php is the home page for verified users, just copy and paste the below code in the file resources/views/auth/home.blade.php
@extends('auth.layouts')

@section('content')

<div class="row justify-content-center mt-5">
    <div class="col-md-8">
        <div class="card">
            <div class="card-header">Home</div>
            <div class="card-body">
                <div class="alert alert-success">
                    You are logged in!
                </div>
            </div>
        </div>
    </div>
</div>

@endsection
login.blade.php is a login page of my app, all you need is to copy paste the below code in file resources/views/auth/login.blade.php
@extends('auth.layouts')

@section('content')

<div class="row justify-content-center mt-5">
    <div class="col-md-8">

        <div class="card">
            <div class="card-header">Login</div>
            <div class="card-body">

                @if ($message = Session::get('success'))
                    <div class="alert alert-danger text-center">
                        {{ $message }}
                    </div>
                @endif

                <form action="{{ route('authenticate') }}" method="post">
                    @csrf
                    <div class="mb-3 row">
                        <label for="email" class="col-md-4 col-form-label text-md-end text-start">Email Address</label>
                        <div class="col-md-6">
                          <input type="email" class="form-control @error('email') is-invalid @enderror" id="email" name="email" value="{{ old('email') }}">
                            @if ($errors->has('email'))
                                <span class="text-danger">{{ $errors->first('email') }}</span>
                            @endif
                        </div>
                    </div>
                    <div class="mb-3 row">
                        <label for="password" class="col-md-4 col-form-label text-md-end text-start">Password</label>
                        <div class="col-md-6">
                          <input type="password" class="form-control @error('password') is-invalid @enderror" id="password" name="password">
                            @if ($errors->has('password'))
                                <span class="text-danger">{{ $errors->first('password') }}</span>
                            @endif
                        </div>
                    </div>
                    <div class="mb-3 row">
                        <input type="submit" class="col-md-3 offset-md-5 btn btn-primary" value="Login">
                    </div>

                </form>
            </div>
        </div>
    </div>
</div>

@endsection
9. Run Laravel Development Server
Now all the steps have successfully been completed to develop Laravel 10 user registration with email verification, just run the Laravel development server to test the application by using the command below.
php artisan serve
And then open your application on the browser and visit the following URL to test your Laravel 10 custom email verification.
http://127.0.0.1:8000/registerConclusion
I hope now you can easily create Laravel 10 custom user registration with email verification application by following the above mentioned steps.
If you found this tutorial helpful, share it with your friends and developers group.
I spent several hours to create this tutorial, if you want to say thanks so like my page on Facebook, Twitter and share it.
Readers Also Read: Laravel 10 REST API using Passport Authentication
Facebook Official Page: All PHP Tricks
Twitter Official Page: All PHP Tricks

That’s is simply awesome, super easy to understand.
Dear Martin, I am glad that you like it.