
Laravel 10 Livewire User Registration and Login
In this tutorial, we will learn about Laravel 10 Livewire User Registration and Login by developing a complete Laravel 10 Livewire custom user registration and login application with easy and step by step guide.
For this tutorial, we will use the Laravel 10, Livewire 3.4 with the Bootstrap 5.3 versions. You can use it even with Laravel 9 or Laravel 11 versions as well.
Readers Also Read: Laravel Custom User Registration and Login
Whenever you are building an application, you will need to manage front end and back end to make your application more adorable.
To make your application more user friendly and easy to navigate there are various front end frameworks and libraries available such as React, Angular and Vue.js.
But whenever, you are building application on Laravel, you can easily apply all those features which are available on any front end framework using Livewire.
Before start working on the Laravel Livewire registration and login tutorial, lets learn about the Livewire.
What is Livewire?
Livewire is a full-stack framework that you can use on Laravel framework. It helps to build dynamic user interfaces easily, you can easily update the user interfaces of your application without leaving the comfort of your Laravel framework.
Livewire can perform all AJAX operations, load complete new component on the page and does not refresh the page without even writing the JavaScript code. Isn’t that sound amazing?
Application Flow:
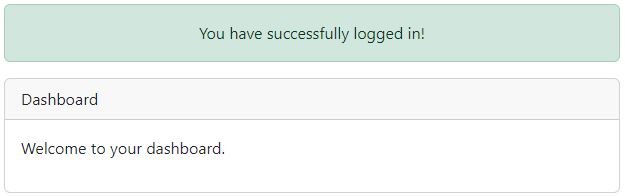
Today, in this tutorial, we will create a simple custom user registration and login form using Laravel Livewire. After successful user registration or user login, user will be redirected to the secured dashboard screen.
A logged in user can see a name on the top right side along with the logout button option in the header menu.
Readers Also Read: Laravel 10 Livewire CRUD Application
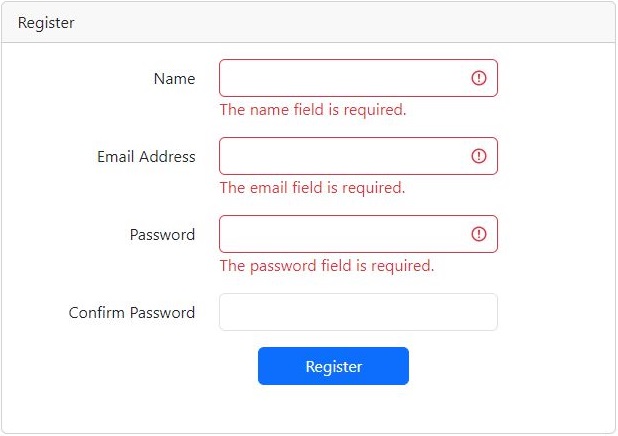
Following are the screenshots of the Laravel 10 Livewire user registration and login application.
Custom User Registration Form
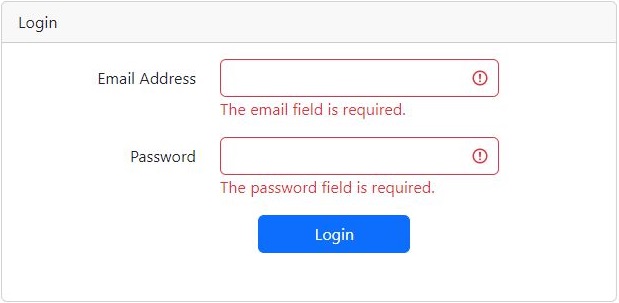
User Login Form
Dashboard Page
Without further delay, lets start building Laravel 10 Livewire Custom User Registration and Login.
Steps to Create Laravel 10 Livewire Custom User Registration and Login
Follow the below simple steps to create Laravel Livewire user registration and login.
- Install Laravel 10 App
- Create Database & Configure Database Credentials
- Migrate Tables to Database
- Install Laravel Livewire
- Create Livewire Layout
- Create and Update Livewire User Registration, Login, Dashboard and Logout Components and Views
- Define Custom User Registration, Login, Dashboard and Logout Routes
- Define Your New Home Route
- Run Laravel Development Server
1. Install Laravel 10 App
Open the command prompt or terminal window and go to the directory where you want to install Laravel application. I usually work on workspace directory created on my Desktop.
cd desktop\workspace
Now install the Laravel 10 version with name LivewireLoginRegister using the below command.
composer create-project --prefer-dist laravel/laravel:^10 LivewireLoginRegister
And then move to the LivewireLoginRegister directory using the below command.
cd LivewireLoginRegister2. Create Database & Configure Database Credentials
In this step, first create a database with name livewire_login_register and then configure your database credentials in the .env file which is available on the root of your Laravel application.
DB_CONNECTION=mysql
DB_HOST=127.0.0.1
DB_PORT=3306
DB_DATABASE=your_db_name
DB_USERNAME=your_db_username
DB_PASSWORD=your_db_password
3. Migrate Tables to Database
Laravel application comes with the default user model and migration therefore we do not need to create a user model or migration, we just need to migrate all Laravel basic tables into our database.
Run the below command to migrate all tables.
php artisan migrate4. Install Laravel Livewire
In this step, we will install Livewire in our Laravel application by running the below artisan command.
composer require livewire/livewire5. Create Livewire Layout
After installing Livewire in our application, we will need to create a Livewire default layout for our entire application.
Just run the below command in your terminal.
php artisan livewire:layoutAnd it will create the Livewire layout at the following location:
\resources\views\components\layouts\app.blade.php
Now open the livewire application layout file app.blade.php and update the following code in it.
<!DOCTYPE html>
<html lang="{{ str_replace('_', '-', app()->getLocale()) }}">
    <head>
        <meta charset="utf-8">
        <meta name="viewport" content="width=device-width, initial-scale=1.0">

        <title>{{ $title ?? 'Laravel 10 Livewire User Registration and Login - AllPHPTricks.com' }}</title>
        <link href="https://cdn.jsdelivr.net/npm/[email protected]/dist/css/bootstrap.min.css" rel="stylesheet" integrity="sha384-4bw+/aepP/YC94hEpVNVgiZdgIC5+VKNBQNGCHeKRQN+PtmoHDEXuppvnDJzQIu9" crossorigin="anonymous">
    <link rel="stylesheet" href="https://cdn.jsdelivr.net/npm/[email protected]/font/bootstrap-icons.css">
    </head>
    <body>

        <nav class="navbar navbar-expand-lg bg-light">
            <div class="container">
              <a class="navbar-brand" href="{{ URL('/dashboard') }}" wire:navigate>Home</a>
              <button class="navbar-toggler" type="button" data-bs-toggle="collapse" data-bs-target="#navbarNavDropdown" aria-controls="navbarNavDropdown" aria-expanded="false" aria-label="Toggle navigation">
                <span class="navbar-toggler-icon"></span>
              </button>
              <div class="collapse navbar-collapse" id="navbarNavDropdown">
                <ul class="navbar-nav ms-auto">
                    @guest
                        <li class="nav-item">
                            <a class="nav-link {{ (request()->is('login')) ? 'active' : '' }}" href="/login" wire:navigate>Login</a>
                        </li>
                        <li class="nav-item">
                            <a class="nav-link {{ (request()->is('register')) ? 'active' : '' }}" href="/register" wire:navigate>Register</a>
                        </li>
                    @else
                        <li class="nav-item dropdown">
                            <a class="nav-link dropdown-toggle" href="#" role="button" data-bs-toggle="dropdown" aria-expanded="false">
                                {{ Auth::user()->name }}
                            </a>
                            <livewire:logout />
                        </li>
                    @endguest
                </ul>
              </div>
            </div>
        </nav>

        <div class="container">
            <h3 class="mt-3 mb-5 text-center">Laravel 10 Livewire User Registration and Login - <a href="https://www.allphptricks.com/">AllPHPTricks.com</a></h3>

            @if (session()->has('message'))
                <div class="row justify-content-center text-center mt-3">
                    <div class="col-md-8">
                        <div class="alert alert-success" role="alert">
                            {{ session('message') }}
                        </div>
                    </div>
                </div>
            @endif

            {{ $slot }}

            <div class="row justify-content-center text-center mt-3">
                <div class="col-md-12">
                    <p>Back to Tutorial:
                        <a href="https://www.allphptricks.com/laravel-10-livewire-user-registration-and-login/"><strong>Tutorial Link</strong></a>
                    </p>
                    <p>
                        For More Web Development Tutorials Visit: <a href="https://www.allphptricks.com/"><strong>AllPHPTricks.com</strong></a>
                    </p>
                </div>
            </div>

        </div>

        <script data-navigate-once src="https://cdn.jsdelivr.net/npm/[email protected]/dist/js/bootstrap.bundle.min.js" integrity="sha384-HwwvtgBNo3bZJJLYd8oVXjrBZt8cqVSpeBNS5n7C8IVInixGAoxmnlMuBnhbgrkm" crossorigin="anonymous"></script>
    </body>
</html>
Make sure that you add the data-navigate-once in your Bootstrap JavaScript script tag as mentioned in the above code before the closing of a body tag.
This will ensure that your Bootstrap drop down menu should work after user registration and login.
6. Create and Update Livewire User Registration, Login, Dashboard and Logout Components and Views
Now, we need to create the Livewire user registration, login, dashboard and logout component classes and blade view files.
Just run the below command in your terminal.
php artisan make:livewire Register
php artisan make:livewire Login
php artisan make:livewire Dashboard
php artisan make:livewire Logout
The above commands will create the component classes and blade view files on the following locations:
app/Livewire/Register.php
app/Livewire/Login.php
app/Livewire/Dashboard.php
app/Livewire/Logout.php
resources/views/livewire/register.blade.php
resources/views/livewire/login.blade.php
resources/views/livewire/dashboard.blade.php
resources/views/livewire/logout.blade.php
Now, we need to update the above all four Livewire component classes and all four view files with the following codes.
Register Component:
Update the following code on file app/Livewire/Register.php
<?php

namespace App\Livewire;

use App\Models\User;
use Livewire\Component;
use Livewire\Attributes\Title;
use Livewire\Attributes\Validate;
use Illuminate\Support\Facades\Auth;
use Illuminate\Support\Facades\Hash;

#[Title('Register - AllPHPTricks.com')]
class Register extends Component
{
    #[Validate('required|string|min:3|max:250')]
    public $name;

    #[Validate('required|email|max:250|unique:users,email')]
    public $email;

    #[Validate('required|string|min:8|confirmed')]
    public $password;

    public $password_confirmation;

    public function register()
    {
        $this->validate();

        User::create([
            'name' => $this->name,
            'email' => $this->email,
            'password' => Hash::make($this->password),
        ]);

        $credentials = [
            'email' => $this->email,
            'password' => $this->password,
        ];

        Auth::attempt($credentials);

        session()->flash('message', 'You have successfully registered & logged in!');

        return $this->redirectRoute('dashboard', navigate: true);
    }

    public function render()
    {
        return view('livewire.register');
    }
}
Login Component:
Update the following code on file app/Livewire/Login.php
<?php

namespace App\Livewire;

use Livewire\Component;
use Livewire\Attributes\Title;
use Livewire\Attributes\Validate;
use Illuminate\Support\Facades\Auth;

#[Title('Login - AllPHPTricks.com')]
class Login extends Component
{
    #[Validate('required|email')]
    public $email;

    #[Validate('required')]
    public $password;

    public function login()
    {
        $this->validate();

        $credentials = [
            'email' => $this->email,
            'password' => $this->password,
        ];

        if(Auth::attempt($credentials))
        {
            session()->flash('message', 'You have successfully logged in!');

            return $this->redirectRoute('dashboard', navigate: true);
        }

        session()->flash('error', 'Invalid credentials!');
    }
    public function render()
    {
        return view('livewire.login');
    }
}
Dashboard Component:
Update the following code on file app/Livewire/Dashboard.php
<?php

namespace App\Livewire;

use Livewire\Component;
use Livewire\Attributes\Title;

#[Title('Dashboard - AllPHPTricks.com')]
class Dashboard extends Component
{
    public function render()
    {
        return view('livewire.dashboard');
    }
}
Logout Component:
Update the following code on file app/Livewire/Logout.php
<?php

namespace App\Livewire;

use Livewire\Component;
use Illuminate\Support\Facades\Auth;

class Logout extends Component
{
    public function logout()
    {
        Auth::logout();

        return $this->redirectRoute('login', navigate: true);
    }

    public function render()
    {
        return view('livewire.logout');
    }
}
Register Blade View:
Update the following code on file resources/views/livewire/register.blade.php
<div class="row justify-content-center mt-5">
    <div class="col-md-8">

        <div class="card">
            <div class="card-header">Register</div>
            <div class="card-body">
                <form wire:submit="register">
                    <div class="mb-3 row">
                        <label for="name" class="col-md-4 col-form-label text-md-end text-start">Name</label>
                        <div class="col-md-6">
                          <input type="text" class="form-control @error('name') is-invalid @enderror" id="name" wire:model="name">
                            @if ($errors->has('name'))
                                <span class="text-danger">{{ $errors->first('name') }}</span>
                            @endif
                        </div>
                    </div>
                    <div class="mb-3 row">
                        <label for="email" class="col-md-4 col-form-label text-md-end text-start">Email Address</label>
                        <div class="col-md-6">
                          <input type="email" class="form-control @error('email') is-invalid @enderror" id="email" wire:model="email">
                            @if ($errors->has('email'))
                                <span class="text-danger">{{ $errors->first('email') }}</span>
                            @endif
                        </div>
                    </div>
                    <div class="mb-3 row">
                        <label for="password" class="col-md-4 col-form-label text-md-end text-start">Password</label>
                        <div class="col-md-6">
                          <input type="password" class="form-control @error('password') is-invalid @enderror" id="password" wire:model="password">
                            @if ($errors->has('password'))
                                <span class="text-danger">{{ $errors->first('password') }}</span>
                            @endif
                        </div>
                    </div>
                    <div class="mb-3 row">
                        <label for="password_confirmation" class="col-md-4 col-form-label text-md-end text-start">Confirm Password</label>
                        <div class="col-md-6">
                          <input type="password" class="form-control" id="password_confirmation" wire:model="password_confirmation">
                        </div>
                    </div>
                    <div class="mb-3 row">
                        <button type="submit" class="col-md-3 offset-md-5 btn btn-primary">
                            Register
                       </button>
                    </div>
                </form>
                <div class="mb-3 row">
                    <span wire:loading class="col-md-3 offset-md-5 text-primary">Processing...</span>
                </div>
            </div>
        </div>
    </div>
</div>
Login Blade View:
Update the following code on file resources/views/livewire/login.blade.php
<div class="row justify-content-center mt-5">
    <div class="col-md-8">

        <div class="card">
            <div class="card-header">Login</div>
            <div class="card-body">
                <form wire:submit="login">
                    <div class="mb-3 row">
                        <label for="email" class="col-md-4 col-form-label text-md-end text-start">Email Address</label>
                        <div class="col-md-6">
                          <input type="email" class="form-control @error('email') is-invalid @enderror" id="email" wire:model="email">
                            @if ($errors->has('email'))
                                <span class="text-danger">{{ $errors->first('email') }}</span>
                            @endif
                        </div>
                    </div>
                    <div class="mb-3 row">
                        <label for="password" class="col-md-4 col-form-label text-md-end text-start">Password</label>
                        <div class="col-md-6">
                          <input type="password" class="form-control @error('password') is-invalid @enderror" id="password" wire:model="password">
                            @if ($errors->has('password'))
                                <span class="text-danger">{{ $errors->first('password') }}</span>
                            @endif
                            @if (session()->has('error'))
                                <span class="text-danger">{{ session('error') }}</span>
                            @endif
                        </div>
                    </div>
                    <div class="mb-3 row">
                        <button type="submit" class="col-md-3 offset-md-5 btn btn-primary">
                            Login
                       </button>
                    </div>
                    <div class="mb-3 row">
                        <span wire:loading class="col-md-3 offset-md-5 text-primary">Processing...</span>
                    </div>
                </form>
            </div>
        </div>
    </div>
</div>
Dashboard Blade View:
Update the following code on file resources/views/livewire/dashboard.blade.php
<div class="row justify-content-center">
    <div class="col-md-8">
        <div class="card">
            <div class="card-header">Dashboard</div>
            <div class="card-body">
                <p>Welcome to your dashboard.</p>
            </div>
        </div>
    </div>
</div>
Logout Blade View:
Update the following code on file resources/views/livewire/logout.blade.php
<ul class="dropdown-menu">
    <li>
        <a class="dropdown-item" href="/logout" wire:click.prevent="logout">Logout</a>
    </li>
</ul>
7. Define Custom User Registration, Login, Dashboard and Logout Routes
In this step, we will need to define our custom Laravel Livewire user registration, login, dashboard and logout routes in routes/web.php file.
Update the following code in routes/web.php file.
<?php

use Illuminate\Support\Facades\Route;
use App\Livewire\Register;
use App\Livewire\Login;
use App\Livewire\Dashboard;
use App\Livewire\Logout;

/*
|--------------------------------------------------------------------------
| Web Routes
|--------------------------------------------------------------------------
|
| Here is where you can register web routes for your application. These
| routes are loaded by the RouteServiceProvider and all of them will
| be assigned to the "web" middleware group. Make something great!
|
*/

Route::get('/', function () {
    return redirect()->to('/login');
});

Route::group(['middleware'=>'guest'], function(){
    Route::get('/register', Register::class)->name('register');
    Route::get('/login', Login::class)->name('login');
});

Route::group(['middleware'=>'auth'], function(){
    Route::get('/dashboard', Dashboard::class)->name('dashboard');
    Route::get('/logout', Logout::class)->name('logout');
});
8. Define Your New Home Route
As you can see in the above web.php file, we have guarded our routes using guest and auth middleware.
If someone tries to access the login or register route, after successful login to the application, the user will be automatically redirected back to the home route which is by default is /home.
We need to update it to the /dashboard route. So we will need to make a small change in our \app\Providers\RouteServiceProvider.php
Just replace the home with dashboard. Search the below line of code in the RouteServiceProvider.php
public const HOME = '/home';
And replace it with the following line of code.
public const HOME = '/dashboard';
That’s it, we have successfully updated our home route.
9. Run Laravel Development Server
Now we have successfully completed all the steps that are required to develop Laravel 10 Livewire custom user registration and login application, this is the time to run the Laravel development server and test our application by running the below artisan command.
php artisan serveAnd then open your web browser and visit the following URL to test your Laravel 10 Livewire user registration and login.
http://127.0.0.1:8000/registerConclusion
I hope by now you have learnt how to create a simple Laravel 10 Livewire custom user login and registration application by following the above simple and easy steps.
If you found this tutorial helpful, share it with your friends and developers group.
I spent several hours to create this tutorial, if you want to say thanks so like my page on Facebook, Twitter and share it.
Facebook Official Page: All PHP Tricks
Twitter Official Page: All PHP Tricks

I am new to Livewire but after following your tutorial, it seems like Livewire is the most easy thing to learn. Thanks
Dear Lorraine,
Thank you for sharing your positive feedback about Laravel Livewire User Registration and Login tutorial. 🙂
To create a product system management
Admin
1) Creates Agent
Agent Name
Agent Surname
Agent Contact Number
Agent Province
Agent Location
Agent Commission
Agent User Name
Agent Password
2) Creates Product
Product Name
Product Size
Product Price
Product Description
Uploads Picture
3) View
Registered Agents
View Customers under Agents
View Product List
View Number of Products sold by each Agent
View The Total Price of Products sold
View Uploaded Payment Documentation by the Customer or Agent
View if Cash Was used to pay
View Total Number of Sold Products (Sales)
Agent
1) Creates Customers
Customer Name
Customer Surname
Customer Contact Number
Customer Province
Customer Location
Customer Shipment Price (If any)
Upload Payment Proof
Cash Button
2) View
Customer Name and Surname and Contact Number
Product Sold per Customers
View Proof of Payment
3) Add Cart
A button to the linked by a customer and calculate the total and the commission
Thanks for sharing such a useful tutorial, this helped me in my project. Thank you so much.
Dear John,
Thanks for your valuable input, glad to know that you found it helpful.