
Integrate Stripe Payment Gateway using PHP

In this tutorial, I will show you how to easily integrate Stripe payment gateway using PHP with step by step and quick guide.
Online payment gateway is a method or way which helps to charge a credit card online, you can integrate online payment gateway either on website or mobile app.
With this online payment feature, we enable users to make a payment of any products or services by sitting at their couch.
In today’s world, payment gateway is an essential for almost every e-commerce or business website, which is offering different kinds of product or services to their customers and clients.
You can find countless online payment gateway service providers. Stripe payment gateway is one of the most popular payment gateway which enables to charge customers credit card online via website.
Stripe accept payments from almost all popular credit cards like Visa, MasterCard, Discover, American Express, JCB and many others.
In this guide, I will show you the complete process of Stripe Payment Gateway Integration using PHP, explaining all steps as simple as possible so that you can easily integrate stripe payment gateway on your website.
Previously, I have shown to you the complete steps of Authorize.Net Payment Gateway Integration using PHP and PayPal Payment Integration in PHP.
Now, without any further delay, lets start Stripe Payment Gateway Integration in PHP in a real quick.
Steps to Integrate Stripe Payment Gateway using PHP
Follow the below all steps to Integrate Stripe Payment Gateway using PHP.
- Create a Database with name allphptricks_cart
- Create a Table in DB with name stripe_payment
- Create an Stripe Account & Get Test API Keys
- Import PHP SDK from Stripe
- Create a config.php File
- Create a dbclass.php File
- Create an index.php File
- Create an stripe-checkout.js File in JS Directory
- Create an stripe_header.php File
- Create a create_payment_intent.php File
- Create a create_customer.php File
- Create a payment_insert.php File
- Create an status.php File
- Create an style.css File in CSS Directory
1. Create a Database with name allphptricks_cart
To create a allphptricks_cart database run the following query in the MySQL.
CREATE DATABASE allphptricks_cart;2. Create a Table in DB with name stripe_payment
To create the table run the following query in the above created DB.
CREATE TABLE `stripe_payment` (
  `id` int(11) NOT NULL AUTO_INCREMENT,
  `fullname` varchar(50) COLLATE utf8_unicode_ci NOT NULL,
  `email` varchar(50) COLLATE utf8_unicode_ci NOT NULL,
  `item_description` varchar(250) COLLATE utf8_unicode_ci NOT NULL,
  `currency` varchar(10) COLLATE utf8_unicode_ci NOT NULL,
  `amount` double(10,2) NOT NULL,
  `transaction_id` varchar(50) COLLATE utf8_unicode_ci NOT NULL,
  `payment_status` varchar(25) COLLATE utf8_unicode_ci NOT NULL,
  `created_at` datetime NOT NULL DEFAULT current_timestamp(),
   PRIMARY KEY (`id`)
) ENGINE=InnoDB DEFAULT CHARSET=utf8 COLLATE=utf8_unicode_ci;
I will use this table to store all payment related information, you can store any information that is required for your application, for example customer address, city, phone number etc.
Note: I have attached the SQL file of this table in download file of this tutorial.
3. Create an Stripe Account & Get Test API Keys
First create an Stripe account, Stripe provides the Test API Keys to test the Stripe integration before go live.
After login to your stripe account go to the Developers then API keys page and get your stripe testing Publishable and Secret keys.
You will see something like below:

Just click on Reveal test key to view the Secret key. Safe both keys, we will use them later in our config file.
When you are in testing mode, you will see the notification of TEST DATA in the top of your account header.
4. Import PHP SDK from Stripe
In this step, we will import the PHP SDK from Stripe to access the Stripe API to charge and process the credit card transactions online.
You can include PHP SDK either using composer method or download the PHP SDK zip file, I will show you the both methods.
- Import with Composer (Recommended)
- Download a zip file of Stripe PHP SDK
i. Import with Composer (Recommended)
In order to import PHP SDK from Stripe using Composer, you will need run a command on command prompt/cmd but first make sure that composer is already installed on your computer, if you do not have composer on your computer, then first you will need to install it, my this tutorial will help you to install composer on Windows 10/11.
After installing the composer, open the command prompt/cmd and go to your project directory where you are creating stripe payment integration using PHP.
Once you reached to your desired application directory then run the following command to import the PHP SDK of Stripe using composer.
composer require stripe/stripe-phpYou will see the installation process something like below in screenshot.
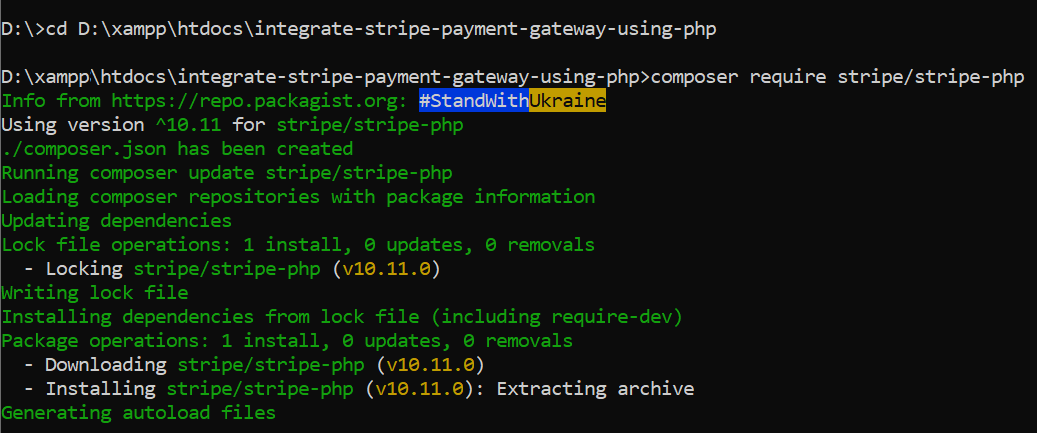
Once the Stripe PHP SDK is imported successfully, it will create a new directory in your application with name vendor and this folder will have all required API which we will use to charge card using Stripe.
If you are not comfortable to import PHP SDK using composer method then you can use the following alternate method.
ii. Download a zip file of Stripe PHP SDK
I have uploaded the PHP SDK of Stripe, click here to download the Stripe PHP SDK zip file.
5. Create a config.php File
Create a config.php file and paste the following code in the file.
<?php
//Stripe Credentials Configuration
define("STRIPE_SECRET_API_KEY", "YOUR STRIPE SECRET KEY");
define("STRIPE_PUBLISHABLE_KEY", "YOUR STRIPE PUBLISHABLE KEY");

//Sample Product Details
define('CURRENCY', 'USD');
define('AMOUNT', '10');
define('DESCRIPTION', 'Laptop Bag');

// Database Credentials Configuration
define('DB_HOST', 'localhost');
define('DB_NAME', 'Your Database Name');
define('DB_USERNAME', 'Your Database Username');
define('DB_PASSWORD', 'Your Database Password');
?>
The above config.php file contains the Stripe API Keys and database credentials details, make sure that you update these credentials with your credentials.
6. Create a dbclass.php File
Now create a dbclass.php file and paste the following code in the file.
<?php
// Start Database Class
class DB
{
	private $db_host = DB_HOST;
	private	$db_name = DB_NAME;
	private $db_user = DB_USERNAME;
	private	$db_pass = DB_PASSWORD;

	private $dbh;
	private $error;
	private $stmt;

	public function __construct()
	{
		//Set DSN (Data Source Name)
		$dsn = 'mysql:host='.$this->db_host.';dbname='.$this->db_name;
		$db_options = array(
			PDO::ATTR_ERRMODE => PDO::ERRMODE_EXCEPTION
		);
		try
		{
			$this->dbh = new PDO($dsn, $this->db_user, $this->db_pass, $db_options);
		}
		catch(PDOException $e)
		{
			echo $this->error = $e->getMessage();
		}
	}

	public function query($query)
	{
		$this->stmt = $this->dbh->prepare($query);
	}

	public function bind($param, $value, $type = null)
	{
		if(is_null($type))
		{
			switch(true)
			{
				case is_int($value);
					$type = PDO::PARAM_INT;
					break;
				case is_bool($value);
					$type = PDO::PARAM_BOOL;
					break;
				case is_null($value);
					$type = PDO::PARAM_NULL;
					break;
				default;
					$type = PDO::PARAM_STR;
			}
		}
		$this->stmt->bindValue($param, $value, $type);
	}

	public function execute($array = null)
	{
		return $this->stmt->execute($array);
	}

	public function lastInsertId()
	{
		return $this->dbh->lastInsertId();
	}

	public function rowCount()
	{
		return $this->stmt->rowCount();
	}

	public function result($array = null)
	{
		$this->execute($array);
		return $this->stmt->fetch();
	}

	public function resultSet($array = null)
	{
		$this->execute($array);
		return $this->stmt->fetchAll(PDO::FETCH_ASSOC);
	}

	public function close()
	{
		return $this->dbh = null;
	}
}
// End Database Class
?>
We will use this dbclass.php to insert the payment related information into our database table.
I have written a separate tutorial about this PDO database class, it is a class which is using a PDO Prepared Statements to store data into our DB.
If you are not familiar with PDO and want to learn more about PDO then you can check out my PDO tutorial about PHP CRUD operations using PDO prepared statements.
7. Create an index.php File
Create an index.php file and paste the following code in the file.
<?php
require_once 'config.php';
?>
<html>
<head>
<title>Demo Integrate Stripe Payment Gateway using PHP - AllPHPTricks.com</title>
<link rel='stylesheet' href='css/style.css' type='text/css' media='all' />
</head>
<body>

<div style="width:700px; margin:50 auto;">
<h1>Demo Integrate Stripe Payment Gateway using PHP</h1>

<!-- Display status message -->
<div id="stripe-payment-message" class="hidden"></div>

<p><strong>Charge $10.00 with Stripe Demo Payment</strong></p>

<form id="stripe-payment-form" class="hidden">
	<input type='hidden' id='publishable_key' value='<?php echo STRIPE_PUBLISHABLE_KEY;?>'>
	<div class="form-group">
		<label><strong>Full Name</strong></label>
		<input type="text" id="fullname" class="form-control" maxlength="50" required autofocus>
	</div>
	<div class="form-group">
		<label><strong>E-Mail</strong></label>
		<input type="email" id="email" class="form-control" maxlength="50" required>
	</div>
	<h3>Enter Credit Card Information</h3>
	<div id="stripe-payment-element">
        <!--Stripe.js will inject the Payment Element here to get card details-->
	</div>

	<button id="submit-button" class="pay">
		<div class="spinner hidden" id="spinner"></div>
		<span id="submit-text">Pay Now</span>
	</button>
</form>

<!-- Display the payment processing -->
<div id="payment_processing" class="hidden">
	<span class="loader"></span> Please wait! Your payment is processing...
</div>

<!-- Display the payment reinitiate button -->
<div id="payment-reinitiate" class="hidden">
	<button class="btn btn-primary" onclick="reinitiateStripe()">Reinitiate Payment</button>
</div>

<br>
<div style="clear:both;"></div>
<p><strong>List of Testing Credit Cards Details</strong></p>
<p>Use the following Sandbox environment testing credit cards details to test the payment process.</p>
<p>
	<ul style="padding-left: 20px;">
		<li>Successful Payment Card VISA (Without 3D Secure) - 4242424242424242</li>
		<li>Requires Authentication Card VISA (With 3D Secure) - 4000002500003155</li>
		<li>Failed Payment Card VISA - 4000000000009995</li>
	</ul>
</p>
<p>Select any future valid expiration date (month/year) & CVC is <strong>123</strong>.</p>

</div>
<script src="https://js.stripe.com/v3/"></script>
<script src="js/stripe-checkout.js" defer></script>
</body>
</html>
The above code will generate an HTML form for taking input of Full Name, Email and credit card details, these are Credit Card number, expire month/year, CVC and country (zip code in case of US or UK).
As you can see in the end of index.php, we have included the Stripe.js v3 library which is the latest library of Stripe, this will inject the Credit Card Information fields into our form.
It means that this library will help us to send all sensitive card related information to Stripe securely.
8. Create an stripe-checkout.js File in JS Directory
Create an stripe-checkout.js file and paste the following code in the file.
// Get Your Stripe Publishable API Key
let publishable_key = document.querySelector("#publishable_key").value;

// Set your Stripe publishable API key to an instance of Stripe Object
const stripe = Stripe(publishable_key);

// Define the card elements variable
let elements;

// Select a payment form element
const paymentForm = document.querySelector("#stripe-payment-form");

// Select a payment submit button
const submitButton = document.querySelector("#submit-button");

// Select a payment submit button text
const submitText = document.querySelector("#submit-text");

// Select a payment submit spinner
const spinner = document.querySelector("#spinner");

// Select a payment message response element
const messageContainer = document.querySelector("#stripe-payment-message");

// Select a payment processing element
const paymentProcessing = document.querySelector("#payment_processing");

// Select a payment reinitiate element
const payReinitiate = document.querySelector("#payment-reinitiate");

// Get a payment_intent_client_secret parameter from URL
const checkClientSecret = new URLSearchParams(window.location.search).get(
    "payment_intent_client_secret"
);

stripeProcessing(true);
// Check is payment_intent_client_secret parameter exist in the URL
if(!checkClientSecret){
    stripeProcessing(false);
    // Create a new instance of Stripe Elements UI library and attach the client secret to it
    initialize();
}

// Check the status of PaymentIntent creation
checkStatus();

// Attach a payment submit event handler to payment form
paymentForm.addEventListener("submit", handlePaymentSubmit);

// Fetch a payment intent and capture the client secret
let payment_intent_id;
async function initialize() {
    const { paymentIntentId, clientSecret } = await fetch("create_payment_intent.php", {
        method: "POST",
        headers: { "Content-Type": "application/json" },
    }).then((r) => r.json());

    const appearance = {
        theme: 'stripe',
        rules: {
            '.Label': {
                fontWeight: 'bold',
            }
        }
    };

    elements = stripe.elements({ clientSecret, appearance });

    const paymentElement = elements.create("payment");
    paymentElement.mount("#stripe-payment-element");

    payment_intent_id = paymentIntentId;
}

// Function to handle payment form submit
async function handlePaymentSubmit(e) {
    e.preventDefault();
    setLoading(true);

    let fullname = document.getElementById("fullname").value;
    let email = document.getElementById("email").value;

    const { customer_id } = await fetch("create_customer.php", {
        method: "POST",
        headers: { "Content-Type": "application/json" },
        body: JSON.stringify({ payment_intent_id: payment_intent_id, fullname: fullname, email: email }),
    }).then((r) => r.json());

    const { error } = await stripe.confirmPayment({
        elements,
        confirmParams: {
            // Make sure to change this to your payment completion page
            return_url: window.location.href+'?customer_id='+customer_id,
        },
    });

    // This point will only be reached if there is an immediate error when
    // confirming the payment. Otherwise, your customer will be redirected to
    // your `return_url`. For some payment methods like iDEAL, your customer will
    // be redirected to an intermediate site first to authorize the payment, then
    // redirected to the `return_url`.
    if (error.type === "card_error" || error.type === "validation_error") {
        showMessage(error.message);
        paymentReinitiate();
    } else {
        showMessage("An unexpected error occured.");
        paymentReinitiate();
    }
    setLoading(false);
}

// Fetch the PaymentIntent status after payment submission
async function checkStatus() {
    const clientSecret = new URLSearchParams(window.location.search).get(
        "payment_intent_client_secret"
    );

    const customer_id = new URLSearchParams(window.location.search).get(
        "customer_id"
    );

    if (!clientSecret) {
        return;
    }

    const { paymentIntent } = await stripe.retrievePaymentIntent(clientSecret);

    if (paymentIntent) {
        switch (paymentIntent.status) {
            case "succeeded":
                // Post the transaction data to the server-side script
                // and redirect to the payment status page
                fetch("payment_insert.php", {
                    method: "POST",
                    headers: { "Content-Type": "application/json" },
                    body: JSON.stringify({ payment_intent: paymentIntent, customer_id: customer_id }),
                })
                .then(response => response.json())
                .then(data => {
                    if (data.transaction_id) {
                        window.location.href = 'status.php?tid='+data.transaction_id;
                    } else {
                        showMessage(data.error);
                        paymentReinitiate();
                    }
                })
                .catch(console.error);
                break;
            case "processing":
                showMessage("Your payment is processing.");
                paymentReinitiate();
                break;
            case "requires_payment_method":
                showMessage("Your payment was not successful, please try again.");
                paymentReinitiate();
                break;
            default:
                showMessage("Something went wrong.");
                paymentReinitiate();
                break;
        }
    } else {
        showMessage("Something went wrong.");
        paymentReinitiate();
    }
}

// Display message
function showMessage(messageText) {
    messageContainer.classList.remove("hidden");
    messageContainer.textContent = messageText;

    setTimeout(function () {
        messageContainer.classList.add("hidden");
        messageText.textContent = "";
    }, 10000);
}

// Show a spinner on payment submission
function setLoading(isLoading) {
    if (isLoading) {
        // Disable the submit button and show a spinner
        submitButton.disabled = true;
        spinner.classList.remove("hidden");
        submitText.classList.add("hidden");
    } else {
        // Enable the submit button and hide a spinner
        submitButton.disabled = false;
        spinner.classList.add("hidden");
        submitText.classList.remove("hidden");
    }
}

// Show/Hide a spinner of processing on payment form
function stripeProcessing(isProcessing) {
    if (isProcessing) {
        paymentForm.classList.add("hidden");
        paymentProcessing.classList.remove("hidden");
    } else {
        paymentForm.classList.remove("hidden");
        paymentProcessing.classList.add("hidden");
    }
}

// Display the payment reinitiate button
function paymentReinitiate() {
    paymentProcessing.classList.add("hidden");
    payReinitiate.classList.remove("hidden");
    submitButton.classList.add("hidden");
}

// Reinitiate stripe payment
function reinitiateStripe() {
    window.location.href=window.location.href.split('?')[0];
}
9. Create an stripe_header.php File
Create an stripe_header.php file and paste the following code in the file.
<?php
// Include the Stripe configuration file
require_once 'config.php';

// Include the Stripe PHP SDK library
require_once 'vendor/autoload.php';

// Set API key
\Stripe\Stripe::setApiKey(STRIPE_SECRET_API_KEY);

// Set content type to JSON
header('Content-Type: application/json');

// Retrieve JSON from POST body
$jsonStr = file_get_contents('php://input');
$jsonObj = json_decode($jsonStr);
?>
10. Create a create_payment_intent.php File
Create a create_payment_intent.php file and paste the following code in the file.
<?php
require_once 'stripe_header.php';
// Define the product item price and convert it to cents
$product_price = round(AMOUNT*100);
try {
// Create PaymentIntent with amount, currency and description
$paymentIntent = \Stripe\PaymentIntent::create([
'amount' => $product_price,
'currency' => CURRENCY,
'description' => DESCRIPTION,
'payment_method_types' => [
'card'
]
]);
$output = [
'paymentIntentId' => $paymentIntent->id,
'clientSecret' => $paymentIntent->client_secret
];
echo json_encode($output);
} catch (Error $e) {
http_response_code(500);
echo json_encode(['error' => $e->getMessage()]);
}
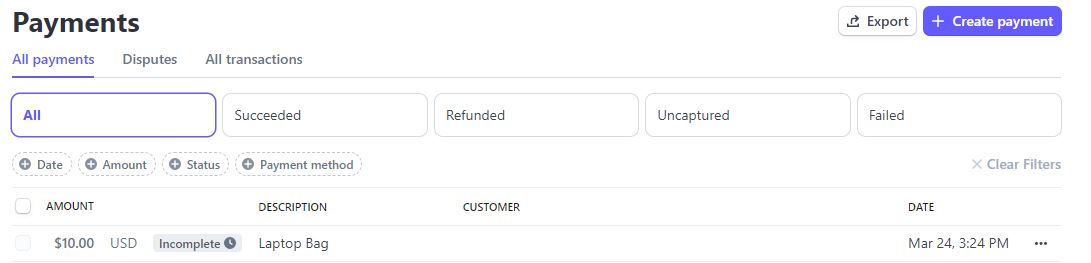
?>When you open the payment screen page, first it will create a client secret using the above create_payment_intent.php file. After opening the payment screen page then you can check on your stripe account that it has initiated a payment with Incomplete Status.
You will see something like below in your Stripe Payments.
11. Create a create_customer.php File
Create a create_customer.php file and paste the following code in the file.
<?php
require_once 'stripe_header.php';

$payment_intent_id = !empty($jsonObj->payment_intent_id)?$jsonObj->payment_intent_id:'';
$fullname = !empty($jsonObj->fullname)?$jsonObj->fullname:'';
$email = !empty($jsonObj->email)?$jsonObj->email:'';

// Add new customer fullname and email to stripe
try {
    $customer = \Stripe\Customer::create(array(
        'name' => $fullname,
        'email' => $email
    ));
}catch(Exception $e) {
    $error = $e->getMessage();
}

if(empty($error) && !empty($customer)){
    try {
        // Attach Customer Data with PaymentIntent using customer ID
        \Stripe\PaymentIntent::update($payment_intent_id, [
            'customer' => $customer->id
        ]);
    } catch (Exception $e) {
        $error = $e->getMessage();
    }
    $output = [
        'customer_id' => $customer->id
    ];
    echo json_encode($output);

}else{
    http_response_code(500);
    echo json_encode(['error' => $error]);
}
?>
Once the user submit the payment form, first it will create the customer with the entered Full Name and Email address, and attach that customer with the initiated payment.
You will see that the customer email has been added to your Stripe initiated payment.

12. Create a payment_insert.php File
Create a payment_insert.php file and paste the following code in the file.
<?php
require_once 'stripe_header.php';
// Include the database connection file
require_once 'dbclass.php';

$payment = !empty($jsonObj->payment_intent)?$jsonObj->payment_intent:'';
$customer_id = !empty($jsonObj->customer_id)?$jsonObj->customer_id:'';

// Retrieve customer information from stripe
try {
    $customerData = \Stripe\Customer::retrieve($customer_id);
}catch(Exception $e) {
    $error = $e->getMessage();
}

if(empty($error)) {
    // If transaction was successful
    if(!empty($payment) && $payment->status == 'succeeded'){
        // Retrieve transaction details
        $transaction_id = $payment->id;
        $amount = ($payment->amount/100);
        $currency = $payment->currency;
        $item_description = $payment->description;
        $payment_status = $payment->status;

        $fulname = $email = '';
        if(!empty($customerData)){
            if(!empty($customerData->name)) {
                $fullname = $customerData->name;
            }
            if(!empty($customerData->email)) {
                $email = $customerData->email;
            }
        }

        $db = new DB;
        // Check if transaction data is already exists in DB with the same Transaction ID
        $db->query("SELECT id FROM `stripe_payment` WHERE transaction_id=:transaction_id");
        $db->bind(":transaction_id", $transaction_id);
        $row = $db->result();
        if(empty($row)){
            // Insert transaction data into the `stripe_payment` database table
            $db->query("INSERT INTO `stripe_payment` (`fullname`, `email`, `item_description`, `currency`, `amount`, `transaction_id`,  `payment_status`) VALUES (:fullname, :email, :item_description, :currency, :amount, :transaction_id, :payment_status)");
            $db->bind(":fullname", $fullname);
            $db->bind(":email", $email);
            $db->bind(":item_description", $item_description);
            $db->bind(":currency", $currency);
            $db->bind(":amount", $amount);
            $db->bind(":transaction_id", $transaction_id);
            $db->bind(":payment_status", $payment_status);
            $db->execute();
        }
        $db->close();
        $output = [
            'transaction_id' => $transaction_id
        ];
        echo json_encode($output);
    }else{
        http_response_code(500);
        echo json_encode(['error' => 'Transaction has been failed!']);
    }
}else{
    http_response_code(500);
    echo json_encode(['error' => $error]);
}
?>
If your payment is successful, then your payment status will be marked as Succeed. You will see the following in your Stripe Payment page.

13. Create an status.php File
Create an status.php file and paste the following code in the file.
<?php
// Include the DB config & class files
require_once 'config.php';
require_once 'dbclass.php';

// If transaction ID is not empty
if(!empty($_GET['tid'])){
    $transaction_id  = $_GET['tid'];

    $db = new DB;
    // Fetch the transaction details from DB using Transaction ID
    $db->query("SELECT * FROM `stripe_payment` WHERE transaction_id=:transaction_id");
    $db->bind(":transaction_id", $transaction_id);
    $row = $db->result();
    $db->close();
    if(!empty($row)){
        $fullname = $row['fullname'];
        $email = $row['email'];
        $item_description = $row['item_description'];
        $currency = $row['currency'];
        $amount = $row['amount'];
    }
}else{
    header("Location: index.php");
    exit();
}
?>
<html>
<head>
<title>Demo Integrate Stripe Payment Gateway using PHP - AllPHPTricks.com</title>
<link rel='stylesheet' href='css/style.css' type='text/css' media='all' />
</head>
<body>

<div style="width:700px; margin:50 auto;">
<h1>Demo Integrate Stripe Payment Gateway using PHP</h1>

<?php if(!empty($row)){ ?>
    <h2 style="color: #327e00;">Success! Your payment has been received successfully.</h2>
    <h3>Payment Receipt:</h3>
    <p><strong>Full Name:</strong> <?php echo $fullname; ?></p>
    <p><strong>Email:</strong> <?php echo $email; ?></p>
    <p><strong>Transaction ID:</strong> <?php echo $transaction_id; ?></p>
    <p><strong>Amount:</strong> <?php echo $amount.' '.$currency; ?></p>
    <p><strong>Item Description:</strong> <?php echo $item_description; ?></p>
<?php }else{ ?>
    <h1>Error! Your transaction has been failed.</h1>
<?php } ?>

</div>
</body>
</html>
After attempting the online payment transaction, you will be redirected to the status page, if the payment was made successfully, it will display the transaction details and if it was failed, it will display the error.
14. Create an style.css File in CSS Directory
Create an style.css file and paste the following code in the file.
body {
    font-family: Arial, sans-serif;
    line-height: 1.6;
}
.pay {
	  text-transform: uppercase;
    background: #F68B1E;
    border: 1px solid #F68B1E;
    cursor: pointer;
    color: #fff;
    padding: 8px 40px;
    margin-top: 10px;
}
.pay:hover {
	  background: #f17e0a;
    border-color: #f17e0a;
}
.form-control {
    display: block;
    padding: 0.375rem 0.75rem;
    font-size: 1rem;
    font-weight: 400;
    line-height: 1.5;
    color: #212529;
    border: 1px solid #ced4da;
    border-radius: 0.375rem;
    margin-bottom: 10px;

}
#stripe-payment-message{
  padding: 20px;
  border-radius: 5px;
  padding-left: 30px;
  margin-bottom: 10px;
  color: #842029;
  background-color: #f8d7da;
  border: 1px solid #f5c2c7;
}
.btn-primary {
  font-weight: 600;
  color: rgb(255, 255, 255);
  text-align: center;
  background-color: rgb(0, 103, 171);
  border: 0 !important;
  border-radius: 6px !important;
  padding: 10px;
  cursor: pointer;
}
.hidden{
    display:none;
}
/* spinner/processing state, errors */
.spinner,
.spinner:before,
.spinner:after {
  border-radius: 50%;
}
.spinner {
    color: #ffffff;
    font-size: 22px;
    text-indent: -99999px;
    margin: 0px auto;
    position: relative;
    width: 20px;
    height: 20px;
    box-shadow: inset 0 0 0 2px;
    -webkit-transform: translateZ(0);
    -ms-transform: translateZ(0);
    transform: translateZ(0);
}
.spinner:before,
.spinner:after {
    position: absolute;
    content: "";
}
.spinner:before {
    width: 10.4px;
    height: 20.4px;
    background: #F68B1E;
    border-radius: 20.4px 0 0 20.4px;
    top: -0.2px;
    left: -0.2px;
    -webkit-transform-origin: 10.4px 10.2px;
    transform-origin: 10.4px 10.2px;
    -webkit-animation: loading 2s infinite ease 1.5s;
    animation: loading 2s infinite ease 1.5s;
}
.spinner:after {
    width: 10.4px;
    height: 10.2px;
    background: #F68B1E;
    border-radius: 0 10.2px 10.2px 0;
    top: -0.1px;
    left: 10.2px;
    -webkit-transform-origin: 0px 10.2px;
    transform-origin: 0px 10.2px;
    -webkit-animation: loading 2s infinite ease;
    animation: loading 2s infinite ease;
}

@-webkit-keyframes loading {
  0% {
    -webkit-transform: rotate(0deg);
    transform: rotate(0deg);
  }
  100% {
    -webkit-transform: rotate(360deg);
    transform: rotate(360deg);
  }
}
@keyframes loading {
  0% {
    -webkit-transform: rotate(0deg);
    transform: rotate(0deg);
  }
  100% {
    -webkit-transform: rotate(360deg);
    transform: rotate(360deg);
  }
}

@media only screen and (max-width: 600px) {
  form {
    width: 80vw;
    min-width: initial;
  }
}
.loader {
  display: block;
  margin: 20px;
  border: 14px solid #f3f3f3;
  border-radius: 50%;
  border-top: 14px solid #3498db;
  width: 80px;
  height: 80px;
  -webkit-animation: spin 2s linear infinite; /* Safari */
  animation: spin 2s linear infinite;
}
/* Safari */
@-webkit-keyframes spin {
  0% { -webkit-transform: rotate(0deg); }
  100% { -webkit-transform: rotate(360deg); }
}
@keyframes spin {
  0% { transform: rotate(0deg); }
  100% { transform: rotate(360deg); }
}
#payment_processing{
  color: #078e29;
  font-weight: bold;
}
The above CSS code will give some beautiful look to your Stripe payment page.
After completing all the above steps, you can test the transaction with testing credit card like VISA – 4242424242424242 and any future credit card expire date and CVC code.
Set Stripe Payment Gateway to LIVE Environment
After successfully integration of Stripe payment gateway using PHP on Testing environment, we will need to switch it to the Live environment to receive the actual online payments using Stripe.
Follow the below simple steps to accept payment in Live environment:
- Log in to your Stripe account from here dashboard.stripe.com
- After login to your stripe account go to the Developers then API keys page and on the top right header section, there is an option to disable the TEST Mode, just click on it.
- Once the Live mode is activated, get your stripe LIVE Publishable and Secret keys.
- Go to you config.php and replace your Stripe Publishable and Secret keys.
Now you have successfully integrated Stripe, you can now receive online payment using the real credit card with Stripe using PHP.
Conclusion
I hope by now you know how to integrate Stripe in PHP, by following the above step by step guide, you can easily integrate Stripe payment gateway using PHP.
If you found this tutorial helpful, share it with your friends and developers group.
I spent several hours to create this tutorial, if you want to say thanks so like my page on Facebook, Twitter and share it.
Facebook Official Page: All PHP Tricks
Twitter Official Page: All PHP Tricks


Great write up. I am running into an issue however. I don’t see the credit card information on the index.php page. All it shows is “Enter Credit Card Information” Followed by PAY NOW. Any ideas? thank you in advance. Dan
Inspect the code on browser and view console tab, it will show the error so that you can fix it. Usually it happens when the stripe does not load due to any JS loading error.
Great simple article and working wonderfully. Many thanks!
Thanks for the appreciation Marcus.
Showing error
No such customer: ‘undefined’
When customer is not found, we create a new customer in stripe.
Hi Javed
Great tutorial it works great.
How can I pass a customer number like meta data and receive it back so I can track on our system?
Also how to get fees and net amount as well?
Any ideas welcome.
Ramsy
Hi,
I’m getting this error:
Uncaught ReferenceError: Cannot access ‘stripe’ before initialization
at stripe-checkout.js:5:16
(anonymous) @ stripe-checkout.js:5
then lines of code:
“// Get Your Stripe Publishable API Key
let publishable_key = document.querySelector(“#publishable_key”).value;
// Set your Stripe publishable API key to an instance of Stripe Object
const stripe = stripe(publishable_key);”
what do I need to change or move?
Dear Simon,
I would like you to first download and run the demo without making any changes in the code.
But make sure that you updated your Stripe Publishable API Key
I just want to say a big thank you, it is a great article, and useful to quick implement this payment system to your website.
I changed my version to separate code into subfolders, templates to make my version more MVC -friendly, but the base of this is working good on test environment. I will implement forward my modified version to my websites.
Of course the payment amount, currency have to move out from the config file to make smell like life software.
Dear Sándor Gerhát,
Glad to know that you found it helpful.
Hi great article thanks. However, if I insert the files into a subfolder I cannot get the payment information
Can you please elaborate which files you keep in sub directory so that I can guide you accordingly.
How to inject stripe.js file in index.php.
Hi,
Great tutorial!
The code works perfectly on chrome, but fails to INSERT INTO `stripe_payment`… on Safari iOS. Have you seen this?
Dear Mark,
Thanks for your input, but insertion query is executing on the server end. It has nothing to do with client end application.
All the PHP scripts and MySQL queries are executed on your web server, when they are compiled successfully then send to your no matter if you are using Chrome, FireFox, Safari, Opera or any other browsers.
Browser just receive the HTML output which they can render on the screen.
Hi, I am using cookies to get stored user’s name and email for the field. Every first time the user create a payment, the step of Reininate Payment posed out with the following message:
“Unrecognized request URL (GET: /v1/customers/). If you are trying to list objects, remove the trailing slash. If you are trying to retrieve an object, make sure you passed a valid (non-empty) identifier in your code. Please see https://stripe.com/docs or we can help at https://support.stripe.com/. ”
But referring to Stripe’s records, the payment is charged and the status is succeed. When user reininate payment, the second time would face no errors about customers details, they will be changed twice. May I know how could I fix this problem?
Seems like you have made some changes in the code which is causing issue.
I would suggest first download my code and try to run my code without any modification on the code.
If my code is running successfully, then you can make changes in it.
I also provide freelancing service, if you want to hire me to resolve your issue, you can share your requirement on my email at [email protected]
Hello Javed,
Thank you so much for this tutorial. I was looking for a way to implement Stripe Intent API. Thank you very much
Dear Tikyd, Glad to know that you found it helpful, share it with your developers group or friends.
Hi Rehman,
Thank your for your script.
Can you add Google reCaptcha for this form of payment. Because now robot card checking is very popular.
Thanks
Hi Justin, Thanks for you input, well I hope I will share Google reCaptcha tutorial soon. For now if you want so you can implement my custom captcha tutorial. Simple Captcha Script Using PHP
Why the config.php file contains the Amount and description. These two fields are not static. How to change the constant value that is mentioned in config.php file.
Dear Roshan,
Just to keep tutorial focus on integration, I keep them constant, you can pass any value that you want. When you land the user to this page, make sure you have already saved value in your variable or session and passed that value to stripe.
Hope this will help you out.
I am getting below error –
Your card number is incomplete.
Your card’s expiry date is incomplete.
3-digit code on back of card
Your card’s security code is incomplete.
although i m entering test data in them
Dear Jyoti,
It seems like your are missing the complete card details. If my shared demo is working on your side then downloaded code will work as well.
I can suggest you to change your browser and make sure that you are entering complete card details.
I just wanted to say this is a fantastic, comprehensive tutorial that clearly explains how to build a payment processing system for any checkout purpose. I am looking to migrate a couple clients from Braintree to Stripe, so this was a handy page to find. I am intrigued as to what it would take to allow a customer to pay for a subscription/recurring payment using this code?
Hi Scott, thanks for the appreciation. I am glad that you found my code helpful. Unfortunately, you can not use this code for subscription/recurring payment. You will need to go through stripe documentations.
As I will get some time, I will share subscription/recurring payment tutorials as well to you all.
How do we make the amount field editable from the form where you input your fullname and email, it would be good to have a field called ‘amount’ that you can pass an amount rather than being hardcoded in config.php
Dear Luke,
Thanks for your input, You can pass any amount that you wish, you simply need to have that amount either in your PHP session or any variable to pass to Stripe. I hardcoded just to show you that you can pass any amount in any variable, you just need to pass any amount which is a mandatory field.
Hi,
Can you help me. I am facing this problem.
Uncaught (in promise) SyntaxError: JSON.parse: unexpected character at line 1 column 1 of the JSON data
http://www.localhost/stripe/js/stripe-checkout.js:73
I want to ask if i can use it on localhost?
Dear Tanveer, yes you can use it on localhost.
How do we change the constant amount and description defined in the config.php to allow a post from an earlier form. it is automatically shutting down the stripe.js iframe implementation
I defined the value in Constant for explanation purpose, you can get the value based on user product selection, your e-commerce app will work as it should be. However, this tutorial contains a ways to integrate stripe in your existing application which is already calculating the amount then you can pass the same amount in the Stripe.
If you need any help, I am available for freelance service.